It seems a lot of mapper struggle with making decent ladders, so I decided to whip up a tutorial on how to create them with BSP. Don't be scared away by the size of this tutorial. It's designed to be very thorough, and once you've done it a couple times, you'll be able to whip up ladders in a matter of seconds (or maybe a couple minutes tops).
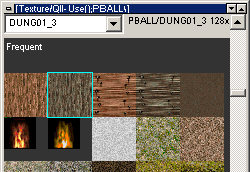
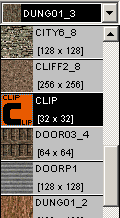
First, select an appropriate texture, such as this wood texture here:
Now create the first rung of the ladder. Keep scale in mind here. I used a grid size of 4 for simplicity. 4 units is about 5 inches. That's a bit thick, but sometimes the compilers will mess up the polygons if you make it any smaller.
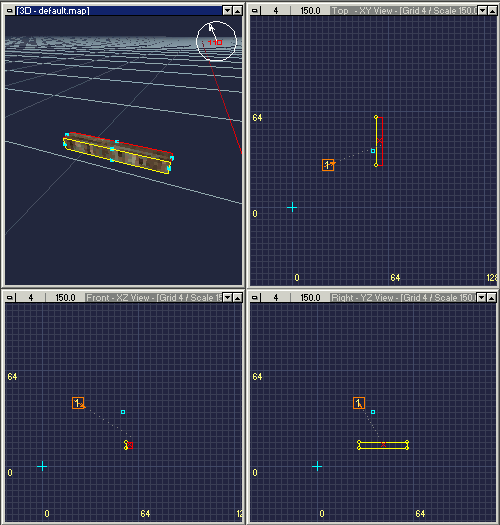
Notice that the texture isn't aligned right. The woodgrain on the side of the brush is going up instead of to the side, so hit "S" to bring up the surface dialog and rotate the texture 90 degrees. You will need to do this for at least 2 faces.
Here's where the magic happens. BSP has a way for us to instantly replicate the ladder rungs. Make sure your rung looks the way you want it before you do this.
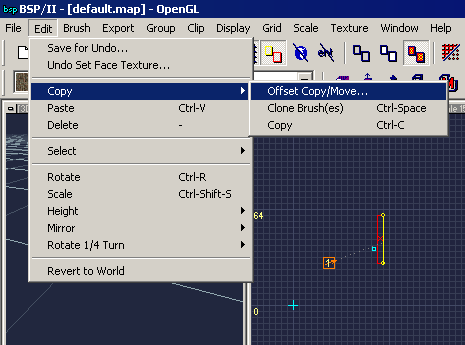
We want the ladder to go up, so we put a value in the Z offset. I used 16 because it will align cleanly with the grid. That's about 1.7 feet. Again, it's a little big, but it looks about right for our big ladder rungs. As for the number of copies, that depends on how tall you want your ladder. Z offset * number of copies = height, or number of copies needed = height / z offset. There will be a little leftover space since the rungs won't be on the very top and bottom of the ladder, but you can always delete any extras if it's too tall.
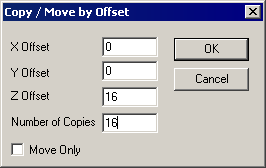
Hit OK, and...
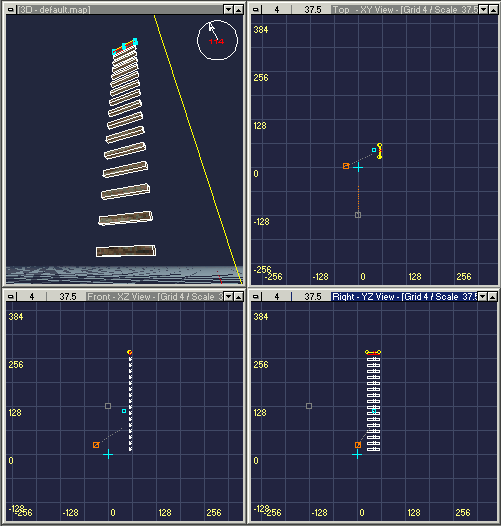
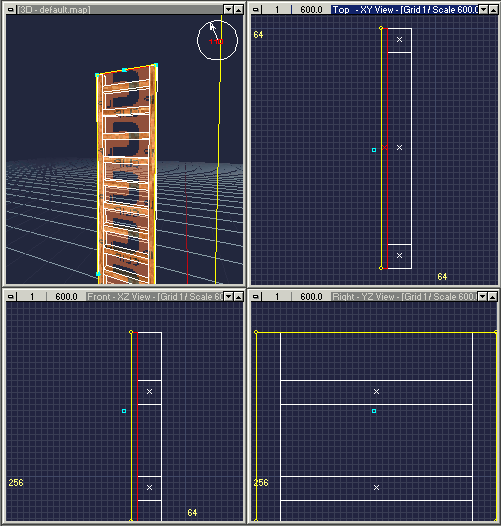
BAM! Instant ladder! Well, most of it.
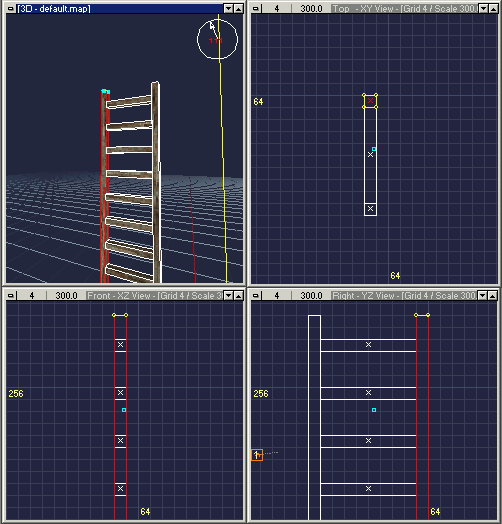
We still need to create the sides. Once you've made one side, just ctrl+space to clone it and move it over to the other side:
Next we need to make it so you can
climb the ladder. The most foolproof way to do this is to put a thin clip brush in front of the ladder and set the ladder flag on it, so select the clip texture...
...and create a thin brush on the area where you want the ladder to be climbable. I set the grid size down to 1 unit for this so people won't notice they aren't quite touching the ladder surface. Be careful when using small grids, though. It's easy to end up with misaligned brushes. You might be better off using a larger grid to create the brush, then scaling it down to adjust the thickness (ctrl+scroll wheel is your friend):
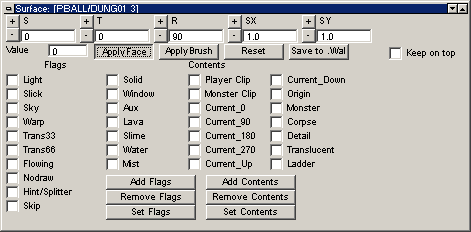
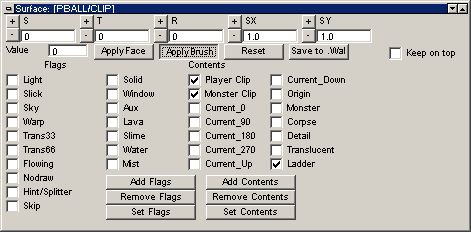
Now we need to set the ladder flag. Bring up your surface properties (hit S) and check "ladder" then "apply brush":
That's it for the critical stuff, but there's a couple more things that will make your ladders even better...
What if somebody's running along and
doesn't want to climb the ladder. It's an annoyance to catch the edge of a ladder and get stuck while you're making a flag run with the enemy hot on your tail, so we'll put in a couple clip wedges to keep that from happening.
Keep using the clip texture, but make sure the ladder flag is
unchecked. Make a brush on the side of the ladder that goes one grid unit past the ladder clip you created earlier. It should be about square:
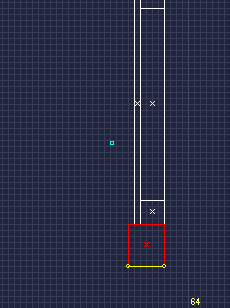
(this is the top view)
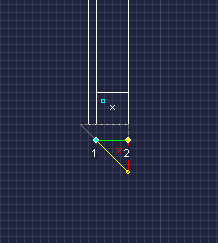
Next, you need to shape it like a wedge/ramp. You can do this with vertex manipulation or clipping planes. I use clipping planes out of habit. Shift + right click to set the points:
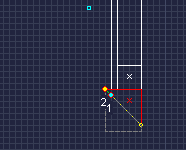
Then press the carve button to cut off the unwanted area:

Now, we can't leave it like that, because the clip brush sticks out and would prevent people from climbing the ladder. We also can't make it flush with the ladder clip brush because the game engine won't know which one to use if a player touches both, sometimes resulting in unclimbable ladders. We need to cut the wedge brush back so it's
behind the ladder clip brush, but the angle of it will launch people past the ladder if they approach it from the side, like so:
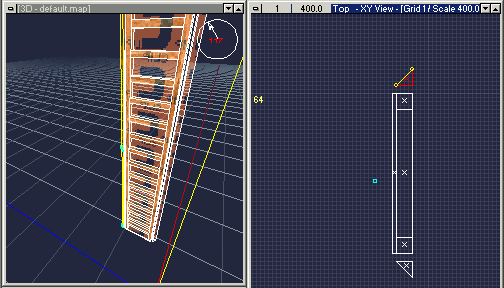
Once you have the one wedge made, you can simply clone it (ctrl+space) and flip it on the X or Y axis (depending on how you have your ladder oriented) with one of these buttons:

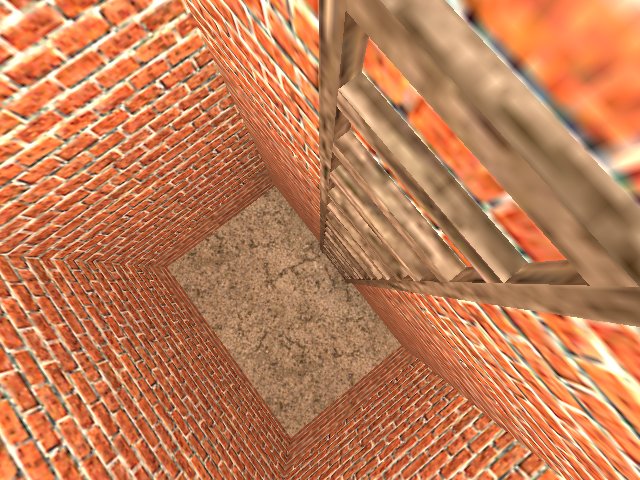
Your final ladder should look something like this:
Now, if you're really nitpicky like me, you might notice once you get in the game that if you look up or down the ladder, the texture is exactly the same on each rung:

This is easy enough to solve, but it's a little tedious. All you have to do is select some rungs, move them around a bit, then lock the texture (alt+L) and move them back. This will put different texture offsets on the ladder rungs so they don't look so repetitive:
Alternatively, you could use the surface dialog and set various offsets on it, but that would probably be even more tedious.
Attached is a map with this ladder for reference:


